


Sketching Animals Series: Part 1
Step by Step sketching a Red Fox

In February (which I know is almost over) I am putting together a three-part series on sketching animals. I had a bunch of illustration work to get through this month, which was honestly the best, but I am excited to close it out with this series.
Before we get into the series, I have one announcement, which is that I am leading a series of virtual sketching field trips to Alaska on Zoom. The first one is next week! We will study post-fire ecology (which is vibrant, resilient, beautiful, and fascinating) in the boreal forest where I lead Girls* in the Forest Trips for two summers. We are also fundraising for Inspiring Girls* Expeditions Alaska because they had some of their funding cut and are raising money to run their summer expeditions. These are tuition-free programs for high school girls* whose mission is empowering young women through science, art, and outdoor exploration. I love working with them. Please consider making a donation to support their programming and/or signing up to sketch with me next Saturday.
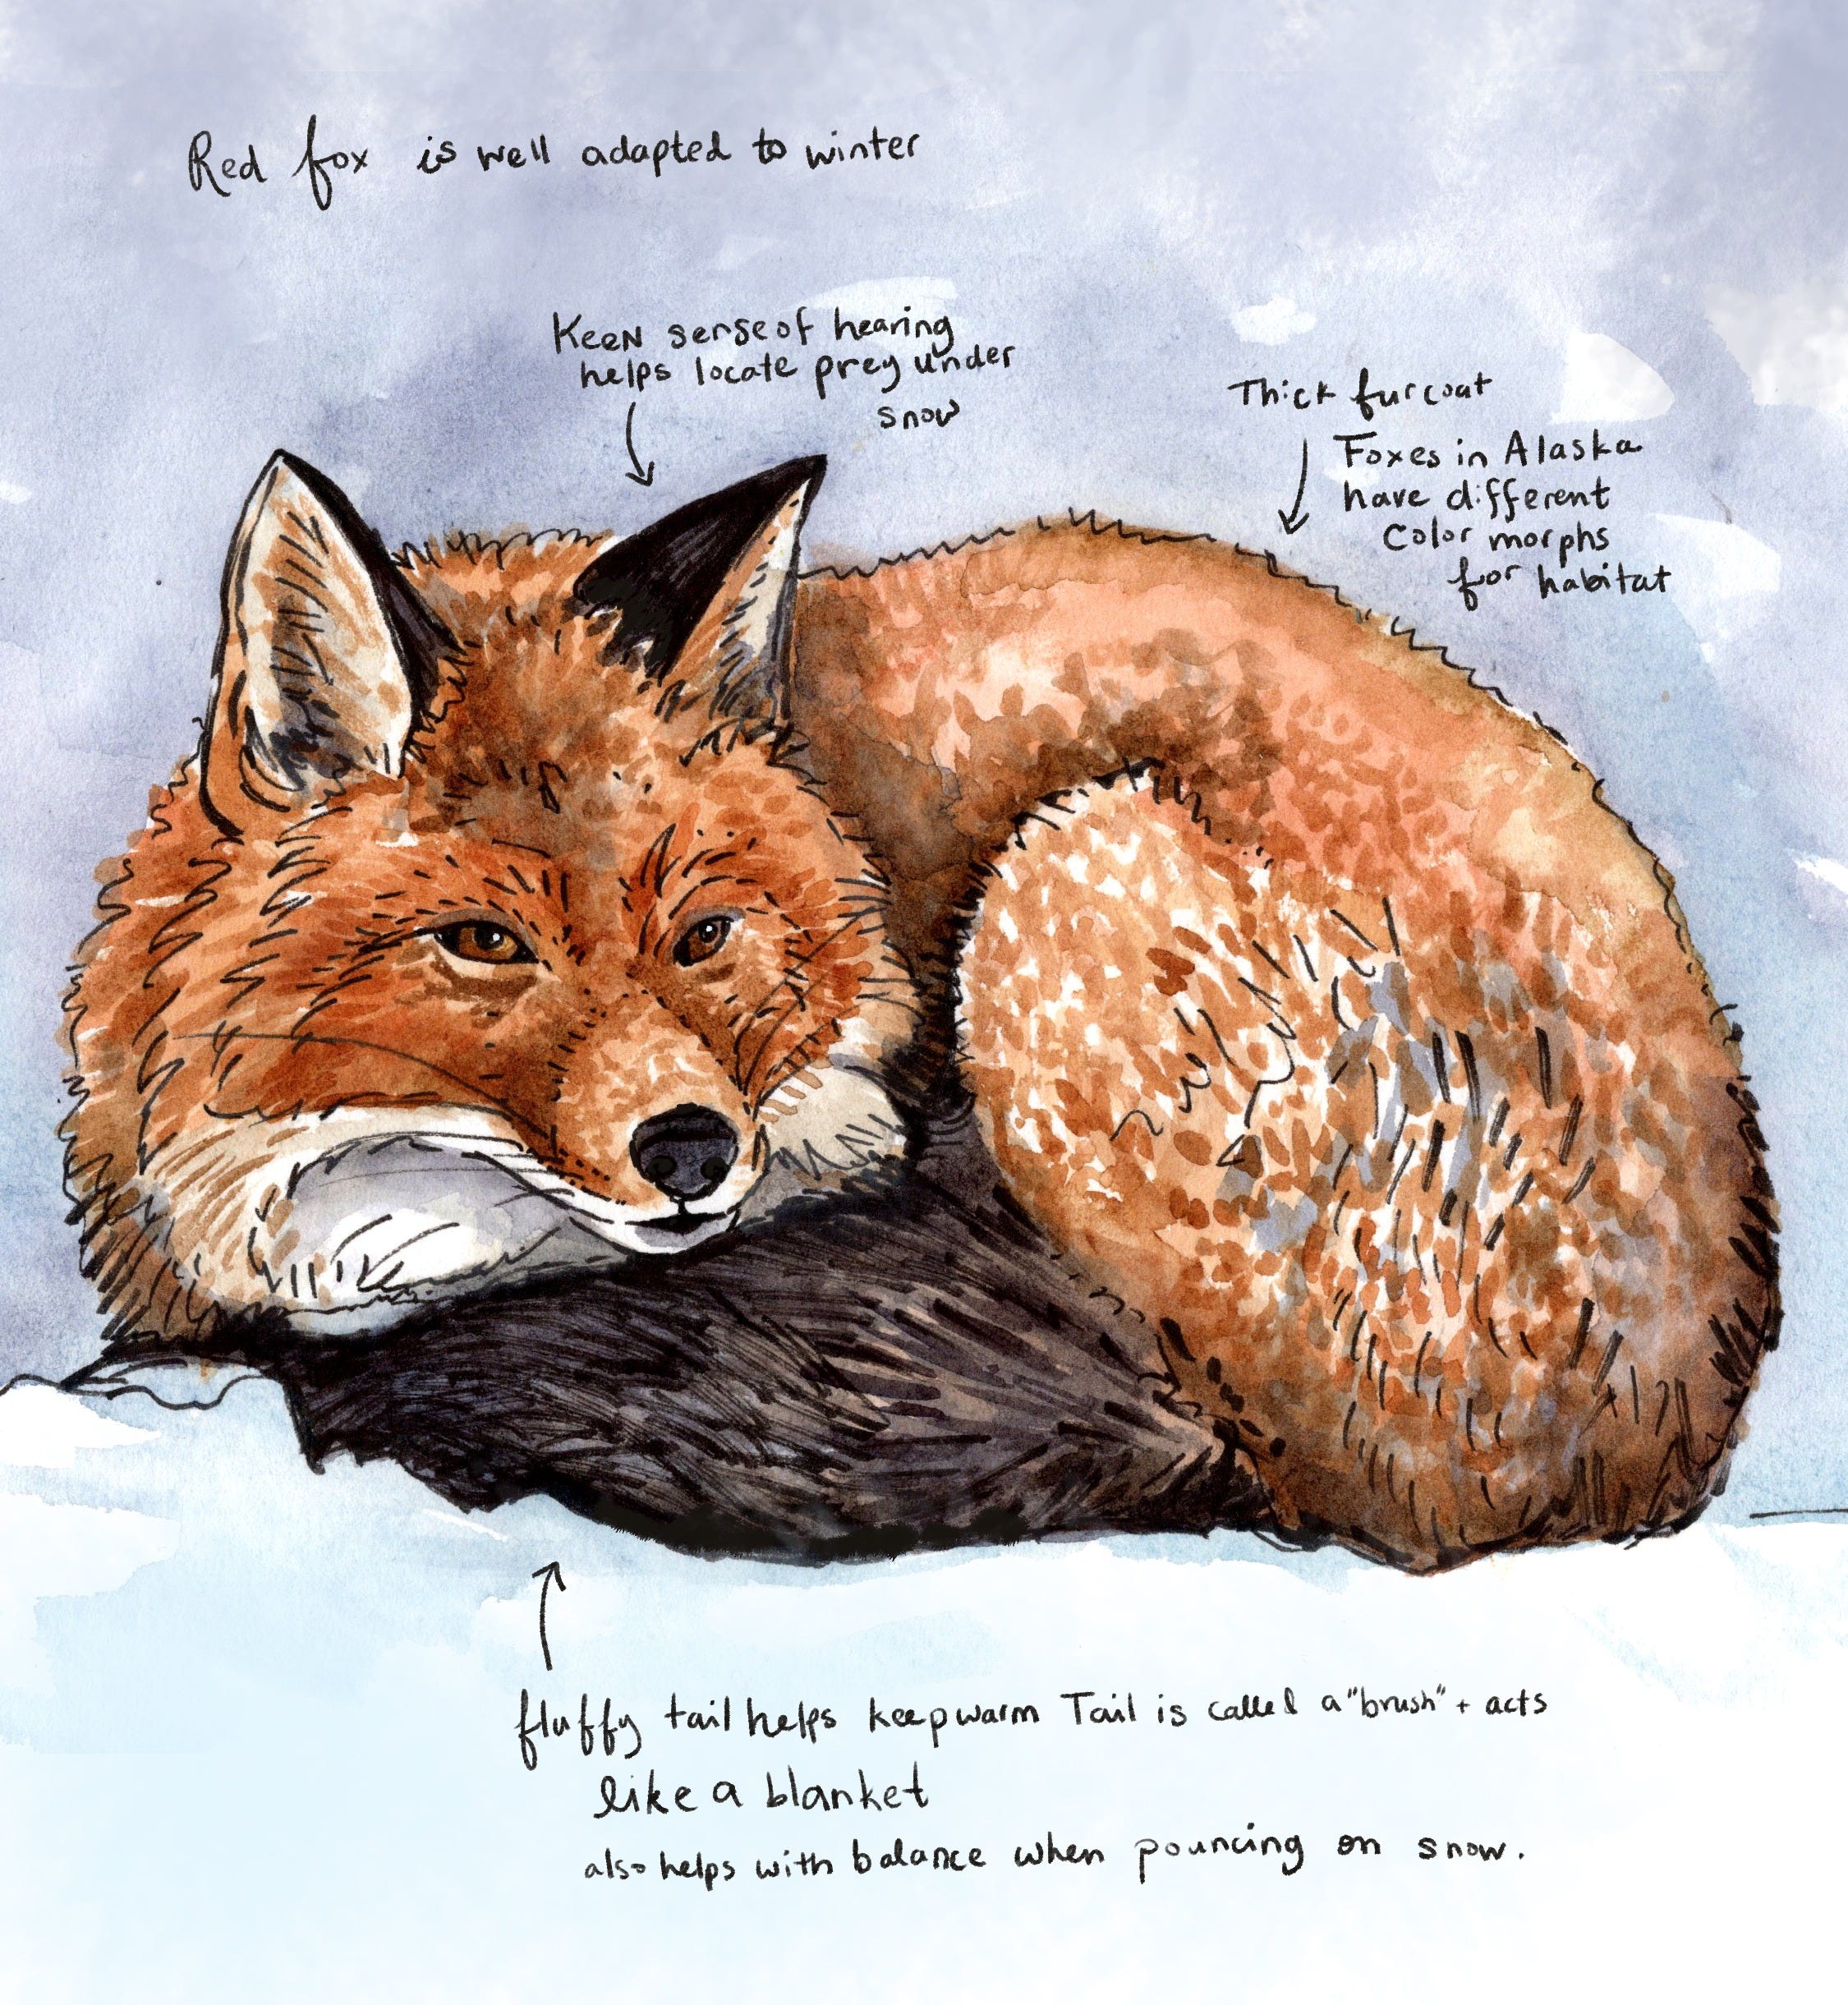
Back to animals: Studying animals is one of my favorite subjects for winter We see their tracks in the snow and know they are around even if we don’t see them. In Alaska, it is so fun to research the adaptations that animals have to live in this cold and snowy environment. Did you know that a fox’s giant fluffy tail, also called a “brush” helps to keep their nose and face warm while sleeping, and it also acts as a counterbalance when they pounce on prey in deep snow?!

I think the hardest part of sketching animals is finding the references. Sometimes we get to glimpse them in person, but they are often far away and disappear so quickly. Thus, I find it very helpful to practice sketching from photos. This helps me to build my knowledge of animal anatomy as well as a visual library for how I draw fur, snouts, ears, eyes, etc. For parts one and two of this series, we will be working from photos I took at the Alaska Zoo. Zoos and wildlife conservation centers are great places to collect image references. In part three we’ll talk about sketching moving animals by looking at some webcam footage. The first photo I have is black and white, which is helpful for seeing values (light and dark) but we will have to find the color information elsewhere. That’s OK.
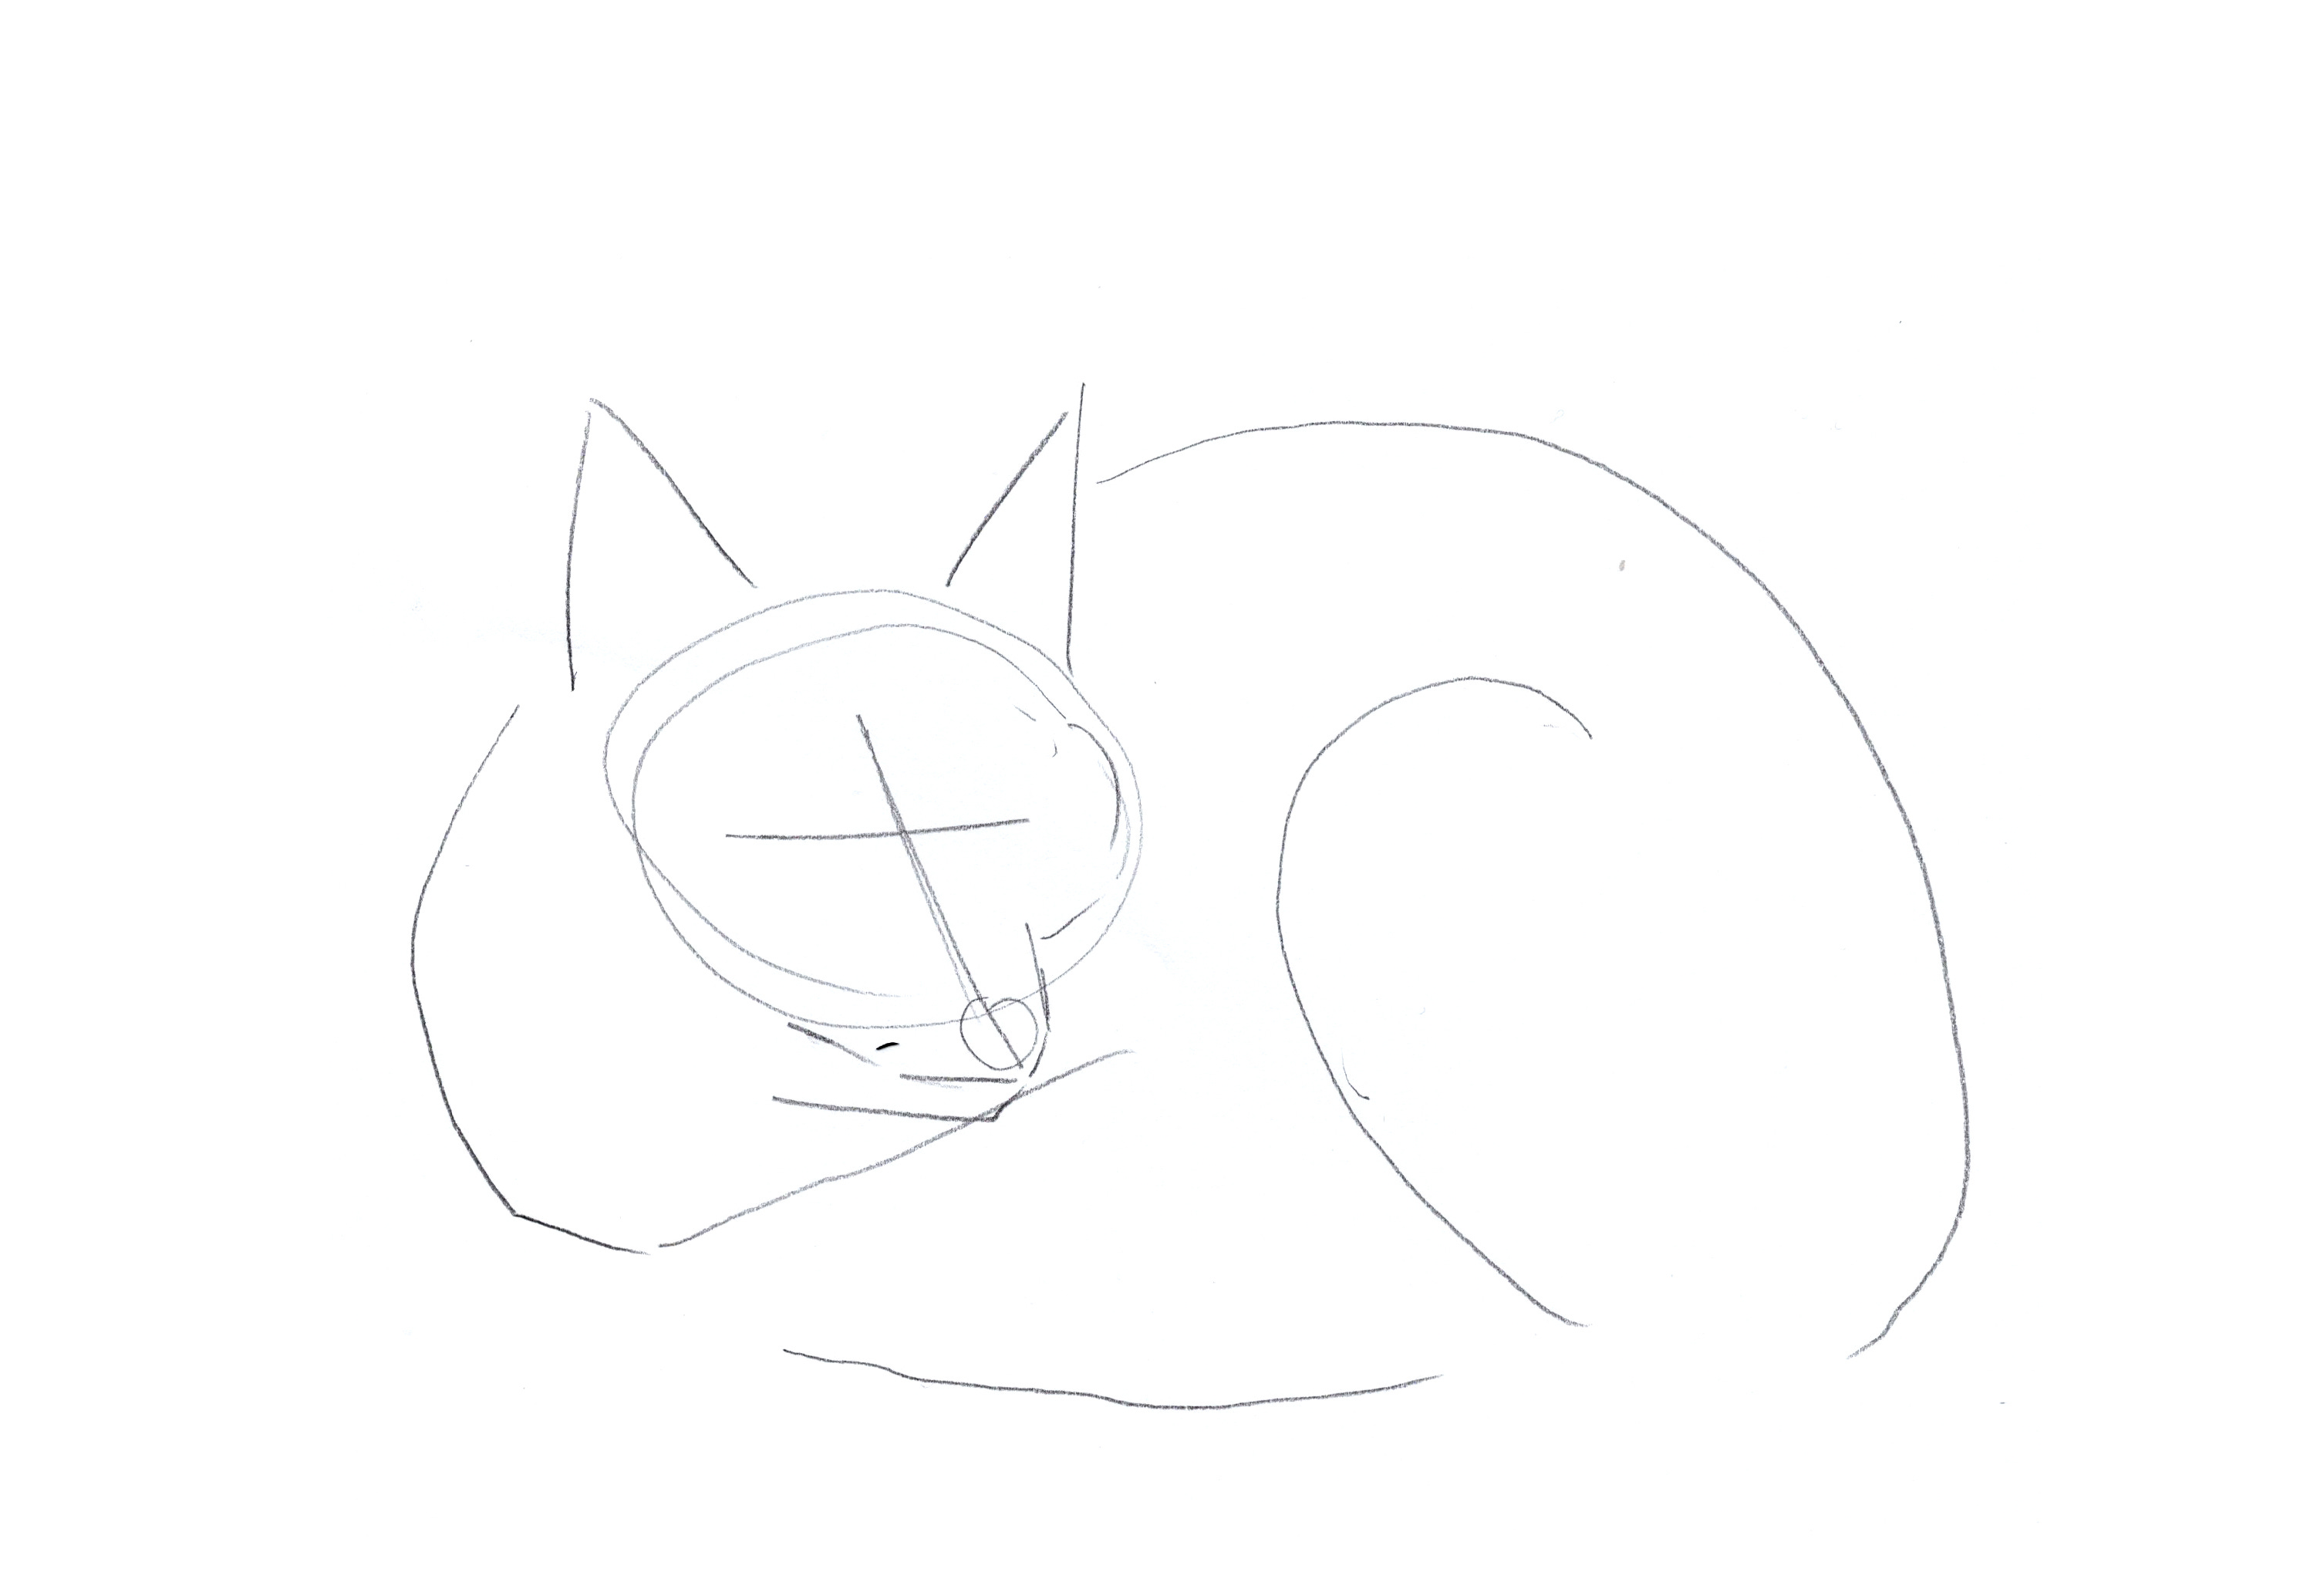
This fox is curled up and sleeping in a ball, so we don’t need to worry about sketching the legs. I start by drawing the main ovals of the body that I see: the head, neck ruff, and back. I also added in the tail and the hind haunch or upper leg. We can see the fox’s face pretty well so we’ll need to pay attention to the details there. To start mapping out the face I drew a cross-shape with two lines: one following the horizontal axis where the eyes are and one following the vertical axis that goes between the eyes and down the snout. The head is tilted at a ¾ angle so this helps me to map out the symmetrical features.
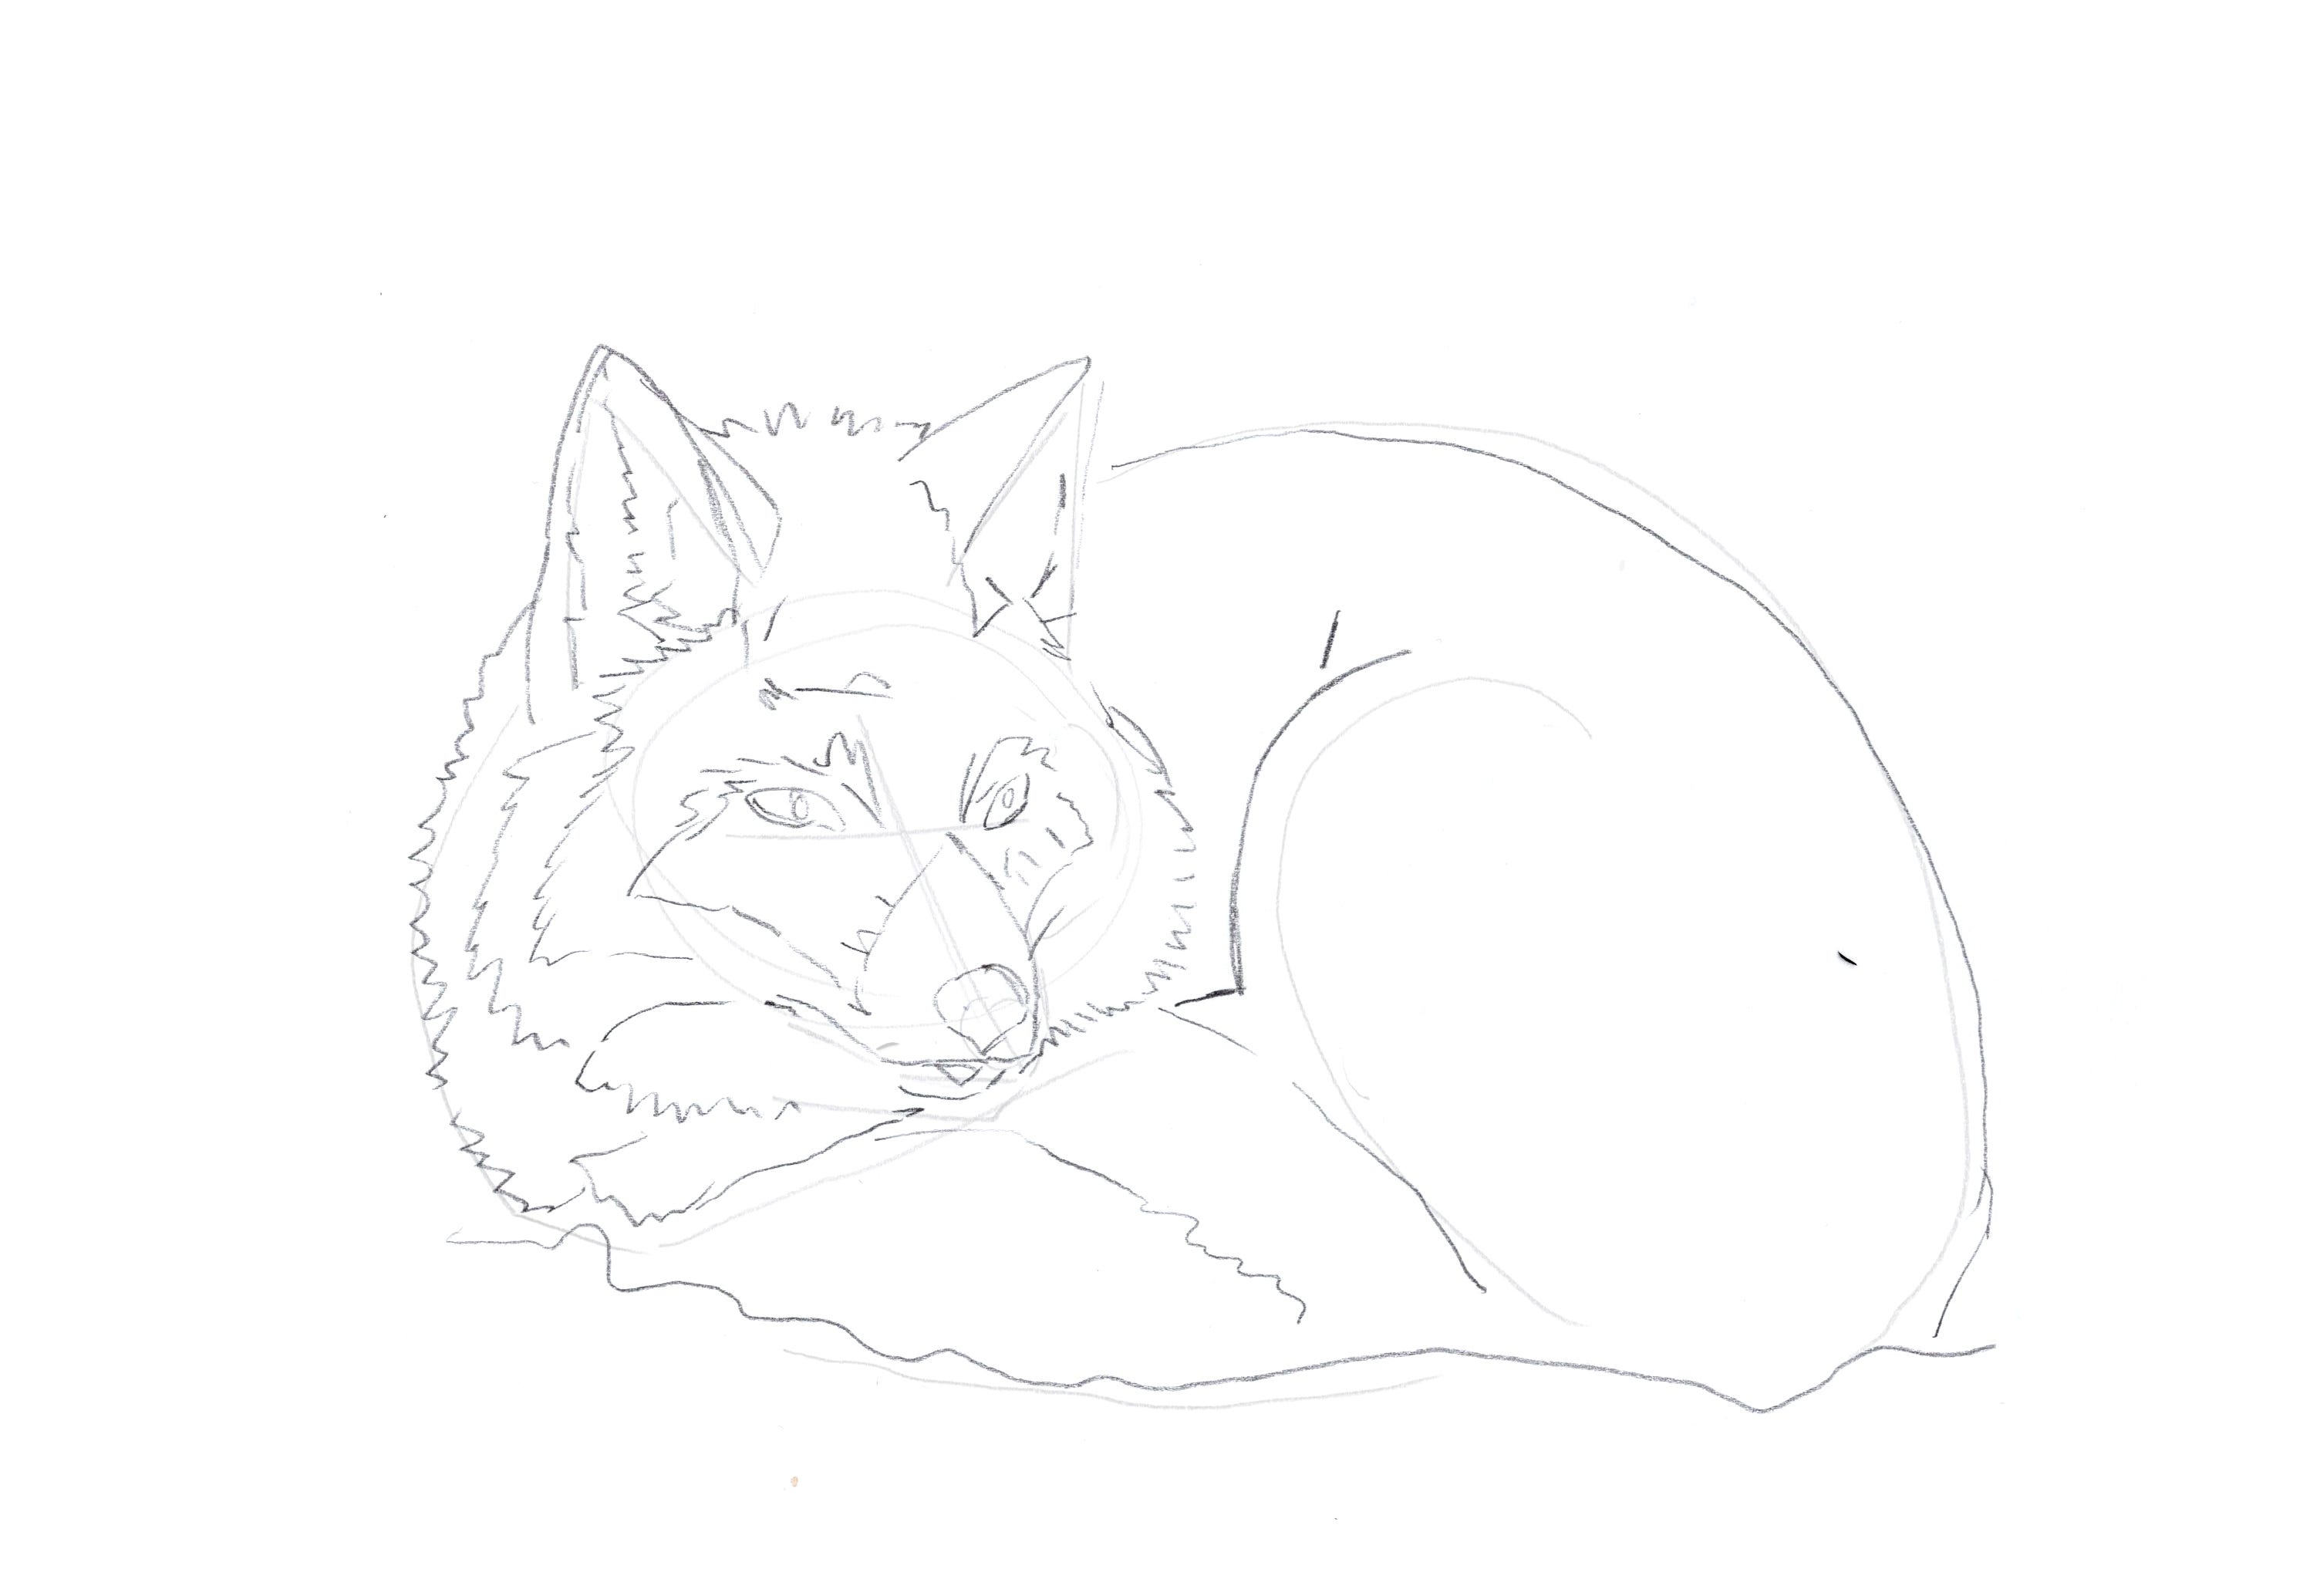
I use the first step above as a map to the rest of my drawing. Once I have the main shapes and proportions I can go in, adjust them, and add in the main contours and chunks of fur. Instead of focusing on each piece of fur, I try to pay attention to the chunks. Fur is attached to the skin that goes over muscle so you can see some of the anatomy of the animal through the fluff, even in a very fluffy position like this. Carefully observe the shapes of the eyes, nose, and mouth, and use the grid lines to help line them up. I noticed after the fact that I drew in the right eye a smidge too low. It is amazing how clued into faces we humans are and one tiny wrong adjustment makes a big difference. However, we are here to sketch and learn; I make mistakes and these do not need to be perfect.
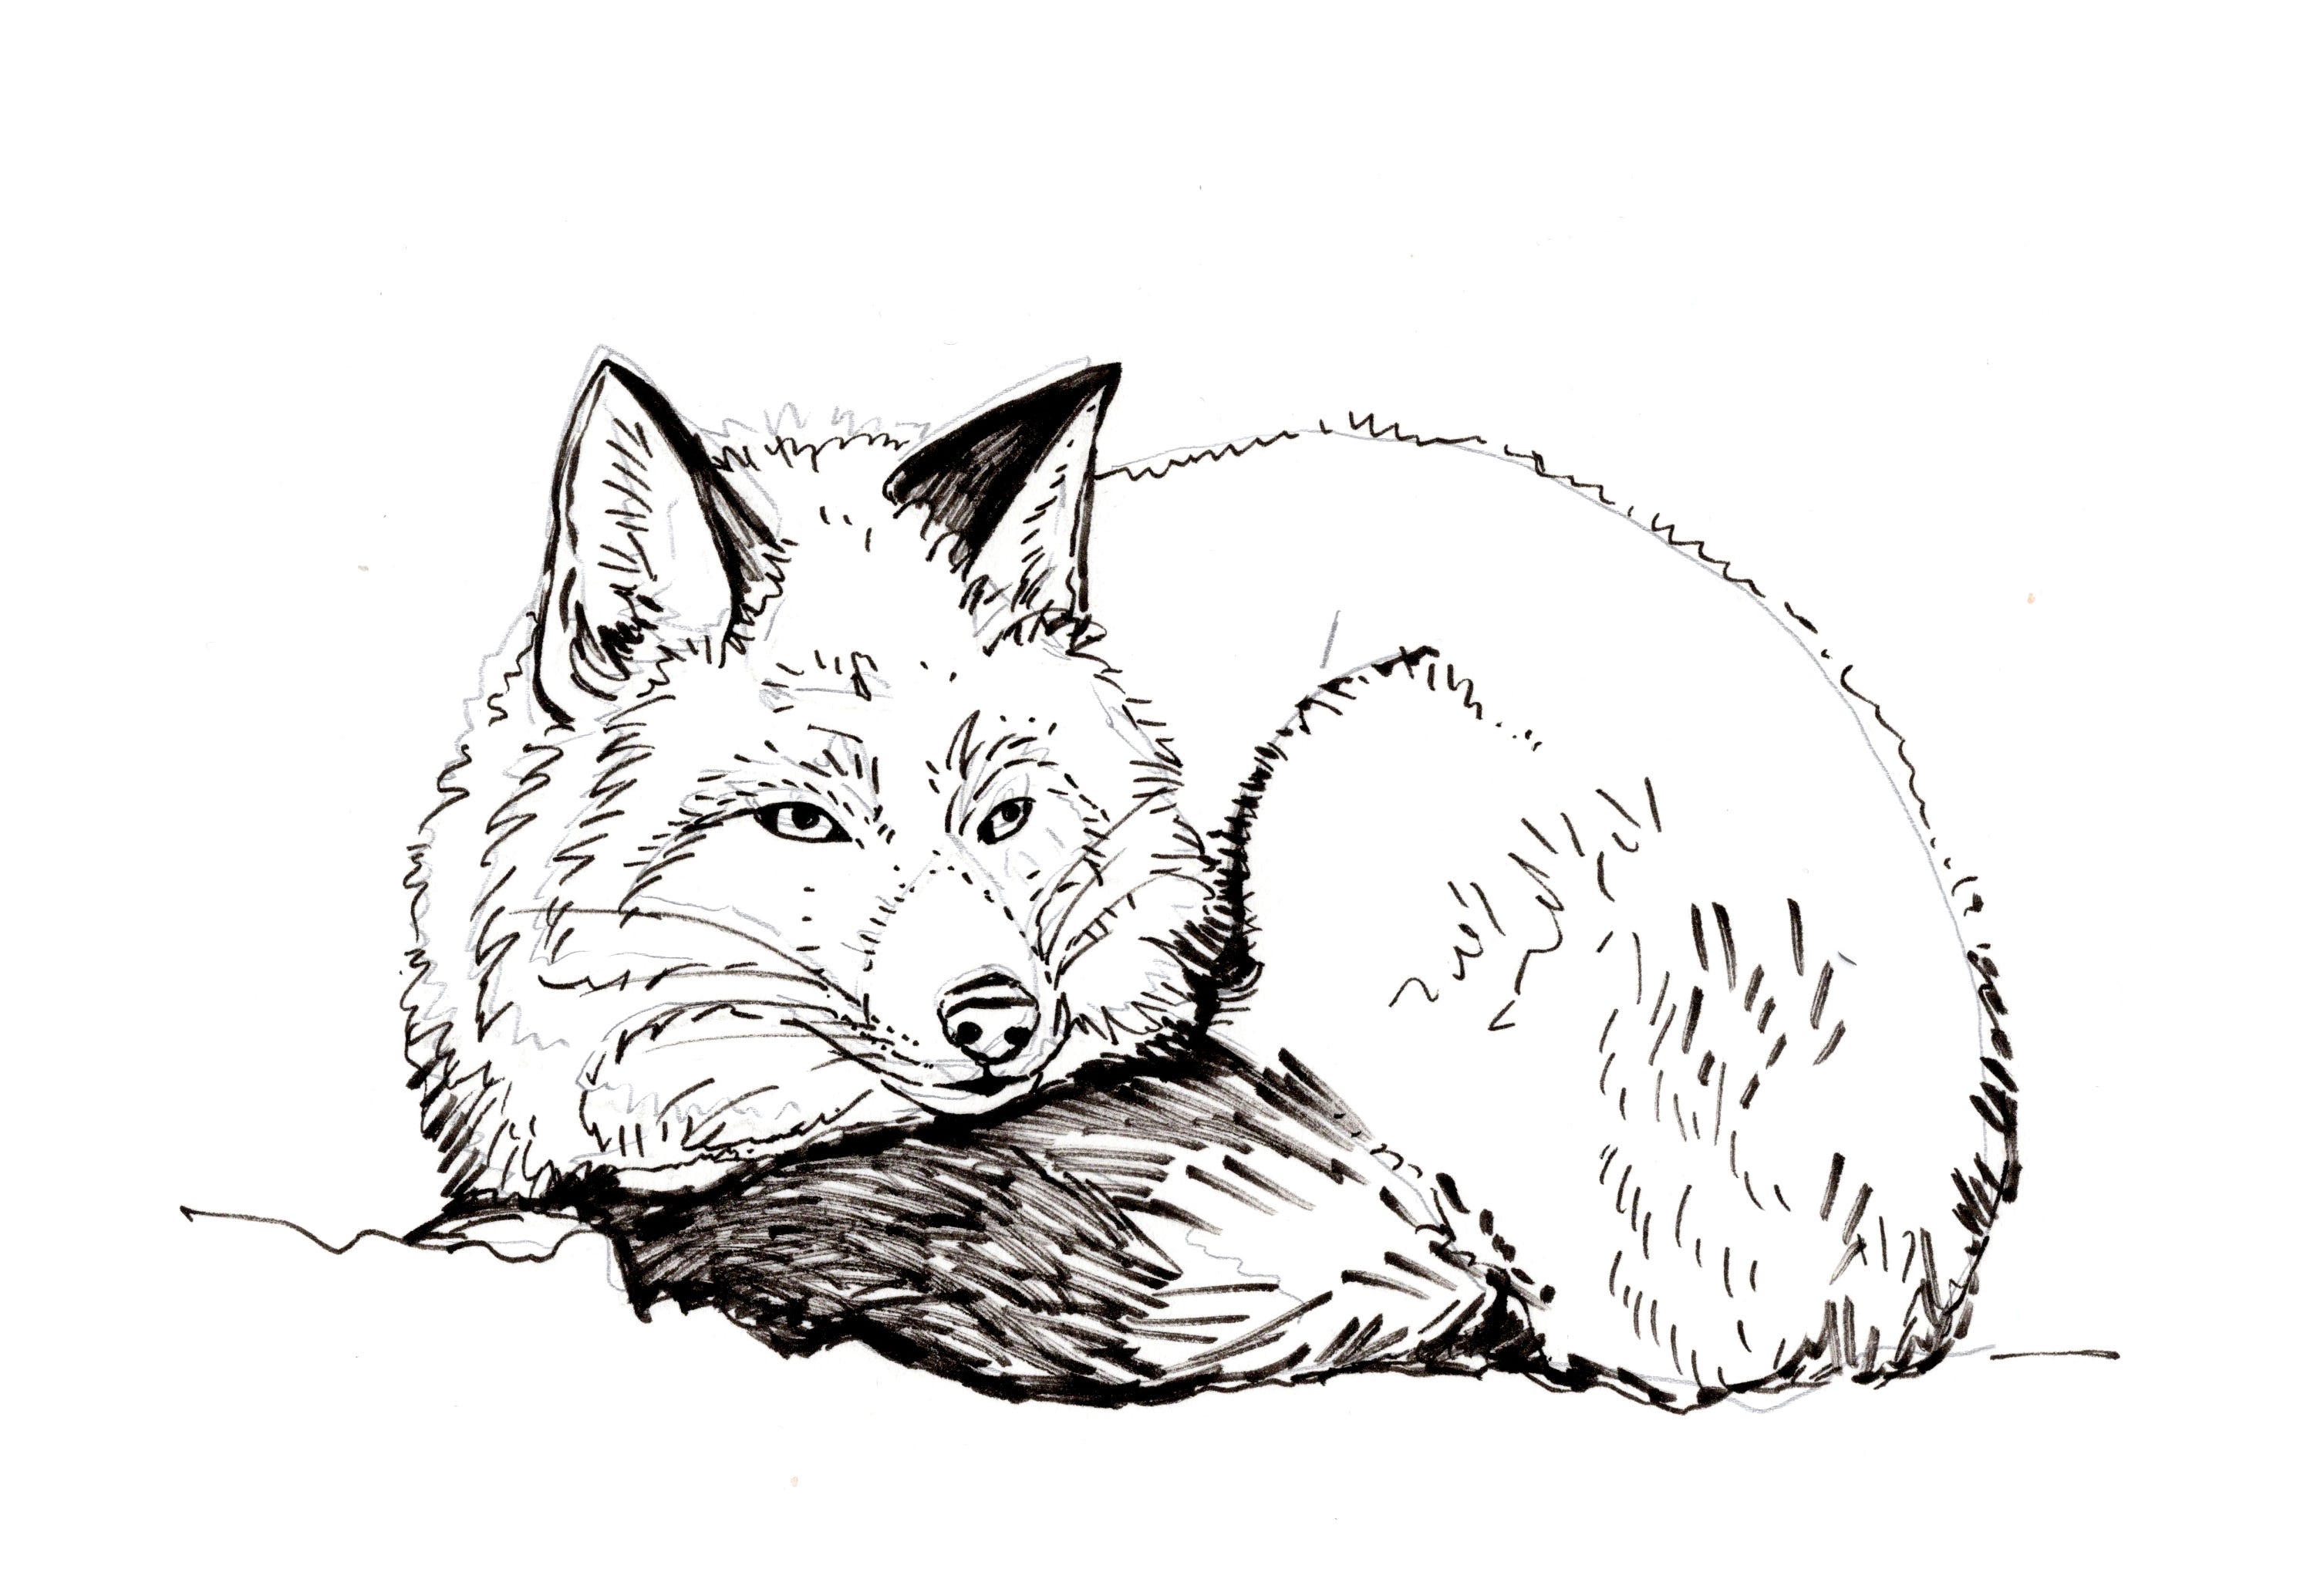
Once I have my pencil sketch, I like to go over it with pen. This provides another opportunity to refine the shapes from steps one and two. I added in a little bit of shading where the fur is darker and some of the direction and texture of the fur. I use a waterproof brush pen so that I can add watercolor without smudging my lines.

Next, I paint the background which gives my fox a place to live and helps me to see the contrast (light against dark) when I paint the fox. I mixed a grayish blue using warm and cool blues and a little bit of brown or red. For the snow, I painted some shadows with my blue, but left some white spots to make it feel like snow. I kept these washes very light and loose using lots of water. I want them to fade a bit into the background and not be the focus of the sketch.
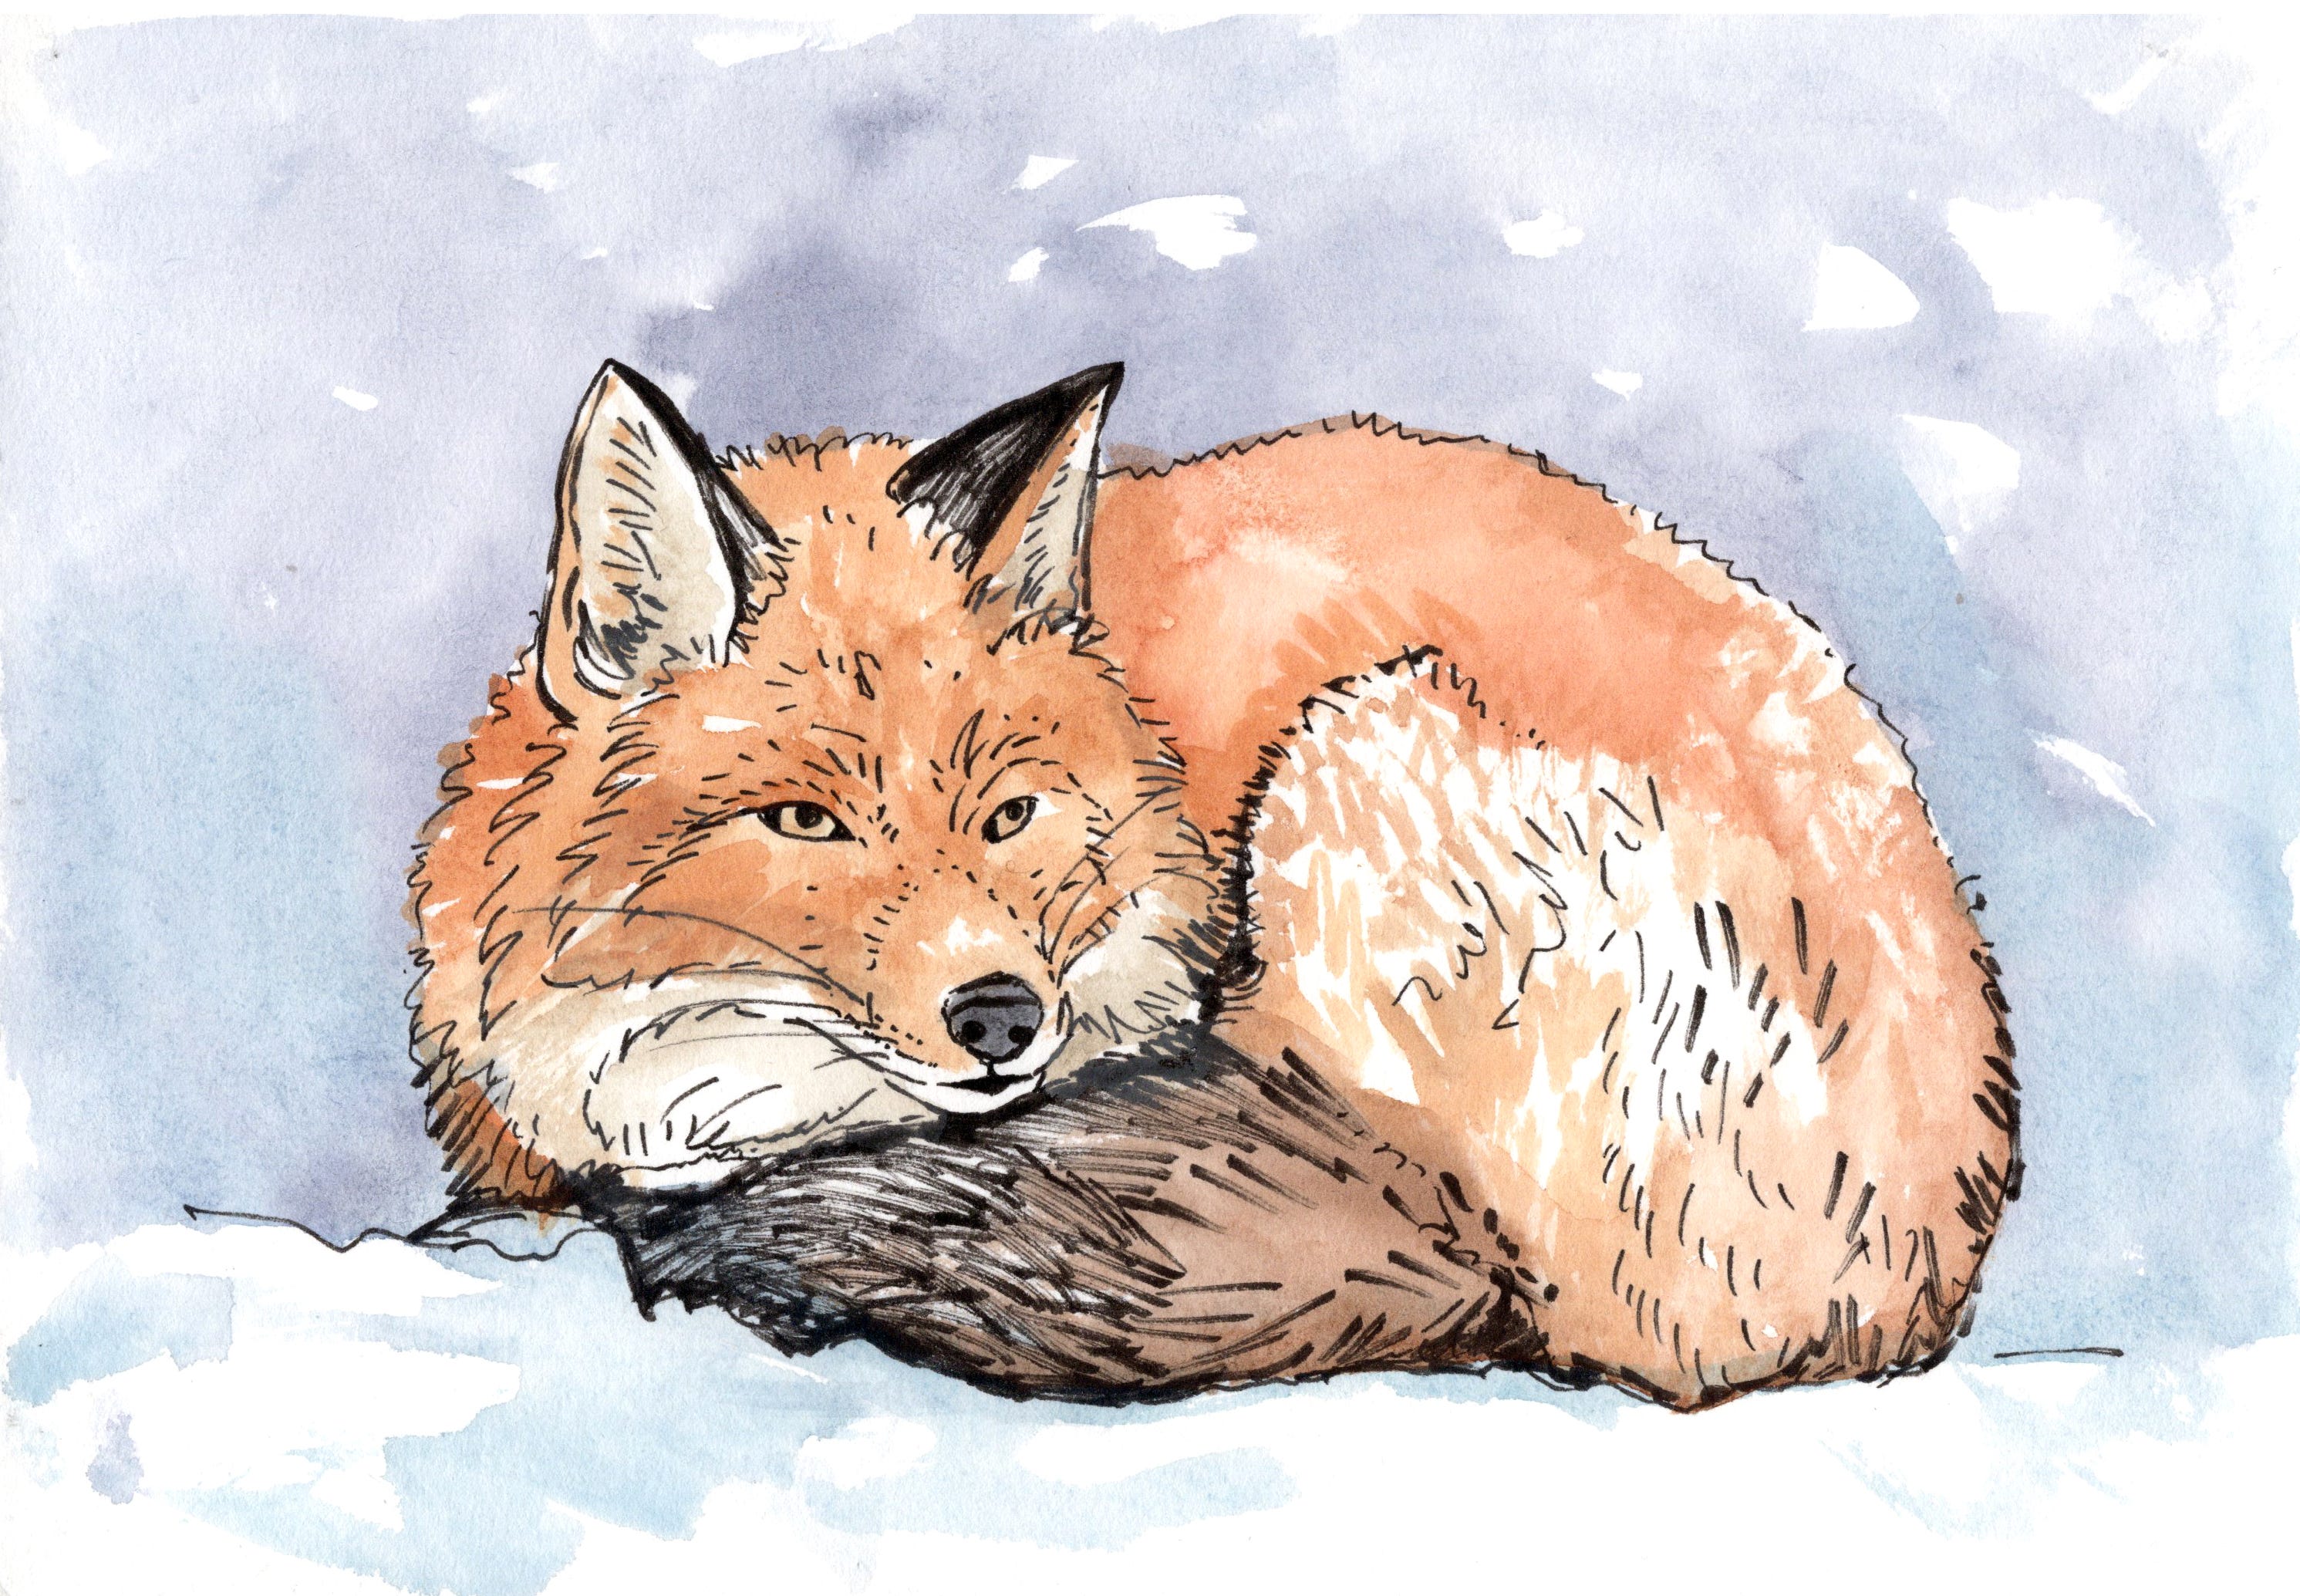
Finally, it is time to paint the fox. I looked up some photos of a red fox online to get an idea of the coloration. With watercolor, we work from light to dark, so I start with the light colors in the fur. I used a light buffy wash for the inner ears and the chest. I mixed a warm rusty orange with burnt sienna, quinacridone gold, and a bit of pyrrol scarlet (warm red). I left some white spaces where we can see into the fur, for example on the haunch where the fur is coming straight out at us. I also mixed raw umber with a cool blue to get a darker brown for the tail and ears.

Once the first layer is dry, we can add a second layer of watercolor to deepen some of the shadows and darker areas. It is so nice to work in layers with watercolor. I mixed a purple-gray for shadows with cool blue (like ultramarine) and warm brown (burnt sienna).

In the next step, I wanted to add some more detail and texture to show the fur. I used a more saturated orange-fur color (more paint and less water) and made different brush strokes to show the texture and direction of the fur. Where the fur is coming straight out I would usually make a little dot instead of a line.

To finish up the sketch I add a few more shadows where I want to create a bit more contrast. This also helps some of the light values pop out. I’ll usually go back to my drawing with pen and add a couple more details, adjustments, and notes.
That is my process! Thanks for following along and let me know if you have any questions.
A really helpful step-by-step guide to sketching and painting. Thank you 🙏
Lovely, so glad to hear about your teaching opportunity. I am a lurker but enjoy your posts!